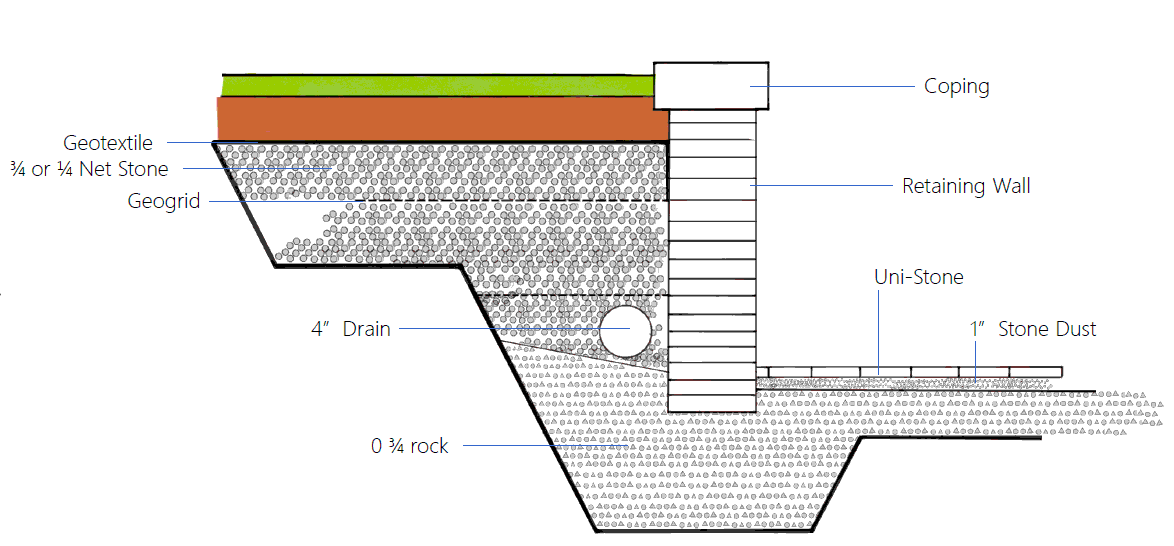
# 1 Excavation
Select the location of the wall. Trace the excavation 6 inches behind and 6 inches in front of the block (for a block of 10 inches of width the excavation should be 22 inches minimum width). Before the excavation ensures that no infrastructure is present (contacted INFO EXCAVATION free service). An excavation of 15 inches deep is required. In case the wall use is to be built for retaining, insure the excavation behind retaining wall has the proper space for nets stone and drainage
# 2 Geotextile membrane
Spread a geotextile membrane in the bottom and on the sides of the excavation. This will prevent contamination of the aggregate foundation with existing soil. The use of nails or staple can help hold the membrane in place. The membrane behind the walls must rape around the net stone
# 3 Backfill and Compaction
Backfill with crushed stone MG 20 mm or 0 3/4. Depending on the type of machinery used for the compaction the backfill must be done per layer to ensure good compaction (generally a 6-inch layer is appropriate). Water the stone to facilitate compaction and reduce dust. Once the compaction is finished the base should be equal and ready to receive the laying bed.
# 4 Installation
Determined height, do the level and Install the first row to the shape desired. The second row of blocks to be Install on the first row by overlapping the joints. Assured you keep the desired level. As the wall is being mounted make sure to install geo textile, 4” perforated drain and net stone for drainage purpose. Make sure it drains at lowest point or every 15’. The top block is called a copping block (finishing block). (All Copping blocks and the corner blocks must be glued). Once the wall is finished fill the back of wall with net stone and wrap with geotextile. This will avoid any contamination and good drainage
